
Post by Daremo on Oct 7, 2012 13:21:13 GMT -5
First, you’ll need to gather up some materials.
Green Stuff
Plumbers Seal Tape
An unmasked head attached to the body you plan to use
Sculpting Tool
Exacto Knife
File/Sandpaper
Water (to keep the green stuff from sticking to your tool and fingers)

Choosing the right head to use is important. The bigger the head you use, the bigger the mask will be. Try to use a head that has short hair (or no hair), as long hair can lead to more problems. I chose the Duke head because I have quite a few of them plus it doesn’t have much hair.
Take the seal tape and cover the head and shoulders. This will keep the green stuff from sticking to the head and body. Credit to Asphalt for that gem. I would have never made a removable hood/mask if not for that tip.
You’ll want to put more seal tape around the neck and under the nose and ears. The idea is to make it so the hood can slide off and on easily without getting stuck. There’s a greater chance the hood will rip or tear when you remove it if it gets stuck.
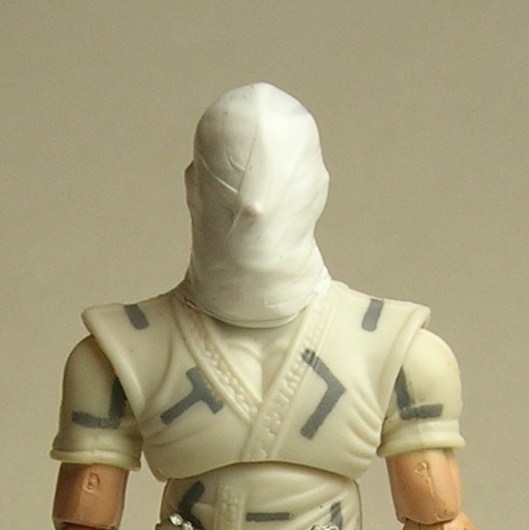


Now mix some green stuff. It’s better to mix a little than to mix too much that you’ll end up wasting. Roll the green stuff into a snake and then spiral it around the head. Make sure to leave an opening where the eyes are located.
Smooth the green stuff out, covering the entire head and below while making sure to leave the eyes clear. A wet finger works well here.
You can mark where the bottom of the hood should be with the sculpting tool.
Remove the excess and let it cure. I usually wait until the next day before I work on it again.
Once it’s cured, you can remove the hood. Use the sculpting tool to loosen the hood (green stuff is flexible) from the head starting around the neck. You should be able to start pulling it off. Take your time because you don’t want to create any rips.
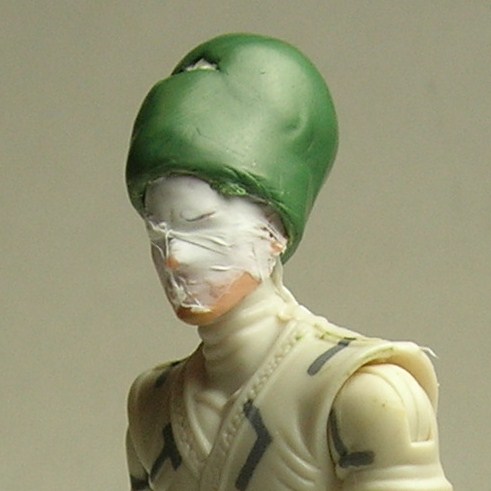
Once you clear the nose it should come right off.

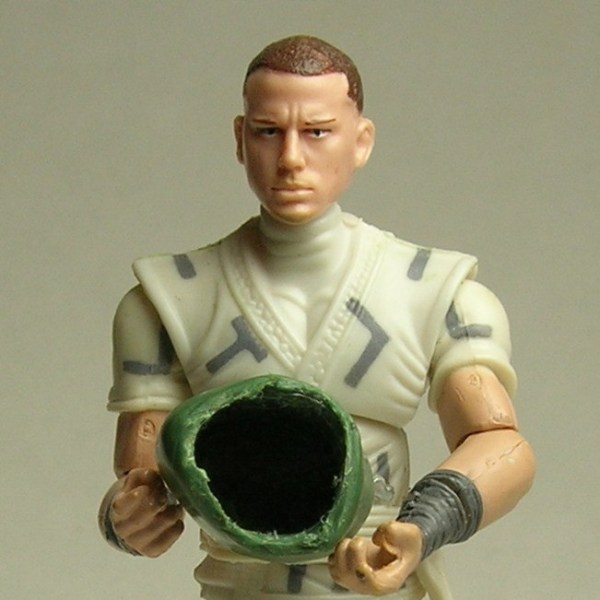
Remove the seal tape from the head and hood.
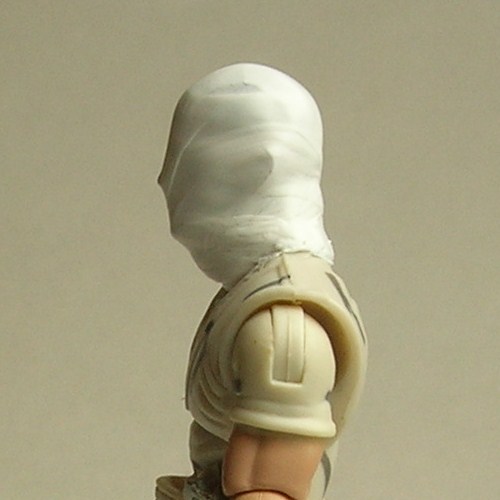
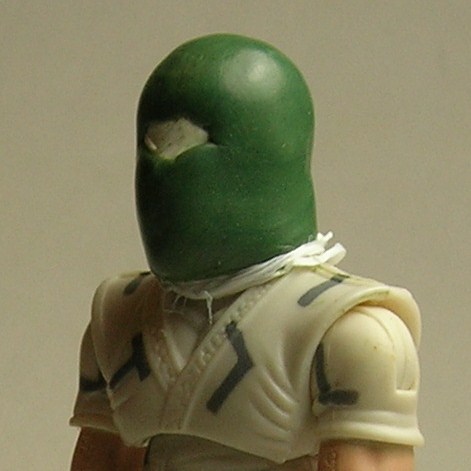
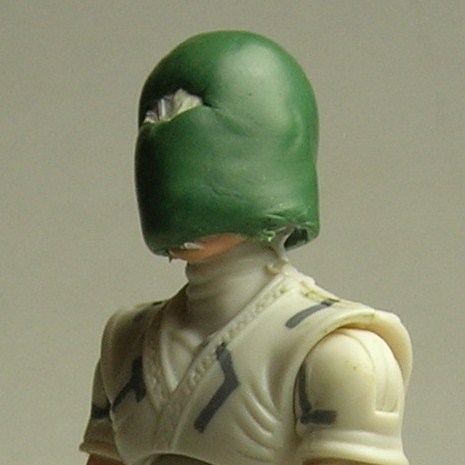
See how it’s kind of thick around the bottom? Use the exacto knife to thin it out a little. If the hood was really tight, remove some of the green stuff from the inside. If the hood came off no problem, you can remove green stuff from the outside with the exacto of file. This will make the hood less bulky.
Check the fit of the hood and repeat the last step if it’s still too tight.

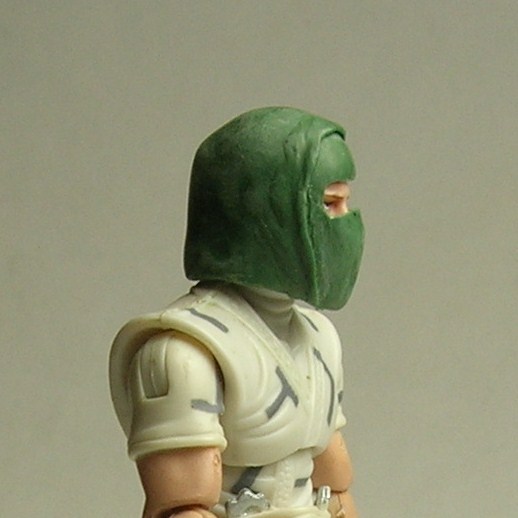
This is what it should look like.

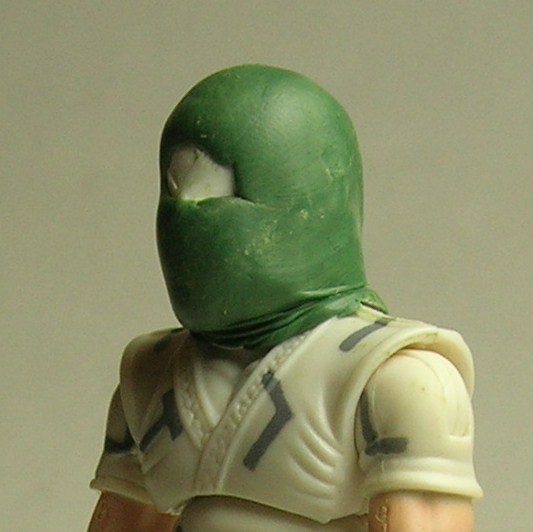
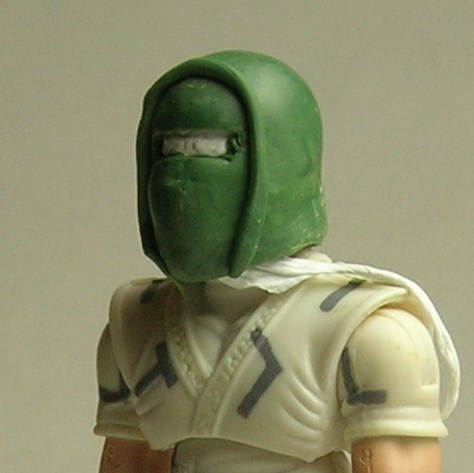
Put the hood back on the head. Using the exacto, lightly mark where the opening for the eyes should be. You don’t want to cut it out just yet.

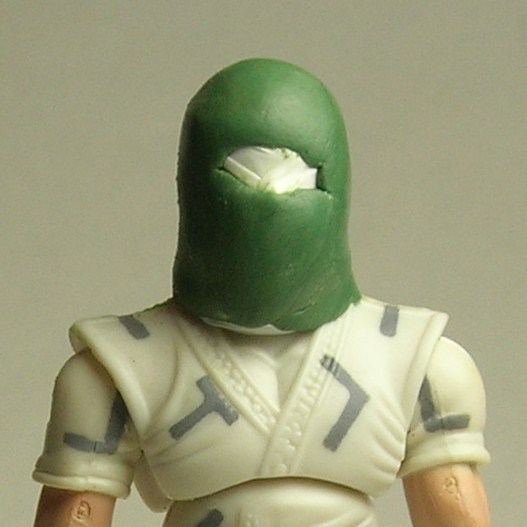
Remove the hood and cut out the opening. The top should be straight across, the sides curved outward, and the bottom an upside down “v”.

Oops, I screwed it up.

Here’s what you do if you mess it up. Remove the hood and use the seal tape again. Put the hood back on and then mix some more green stuff. You can fix rips in this manner too.

Add the green stuff to the trouble spot. Once it cures, repeat the steps again for the opening.
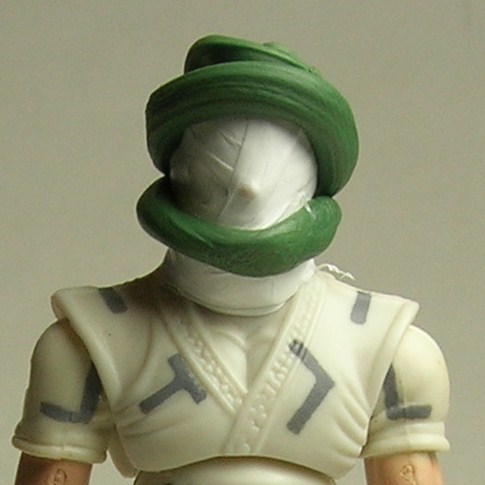
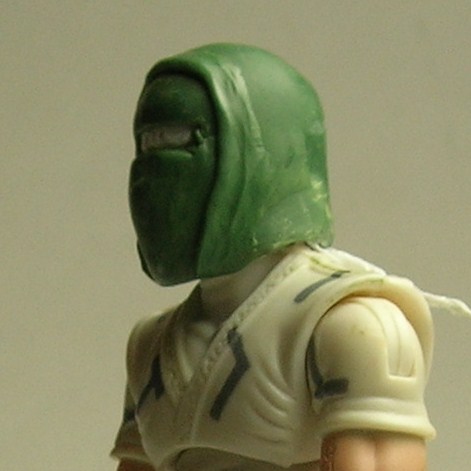
Now we’re ready to add some detail. Mix some green stuff and roll a thin snake. Place it around the front of the hood as shown.
Smooth the green stuff towards the back of the hood on all sides.

Using the rounded end of the sculpting tool, make some ripples around the edge.
Smooth everything out with a wet finger.

Using the spade end of the sculpting tool, thin the edge of the outer hood.

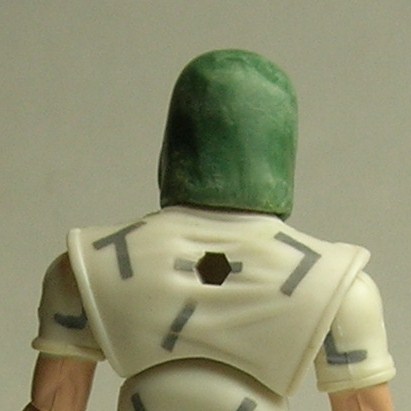
After the green stuff has cured, you can sand everything smooth and trim any problem areas with the exacto.


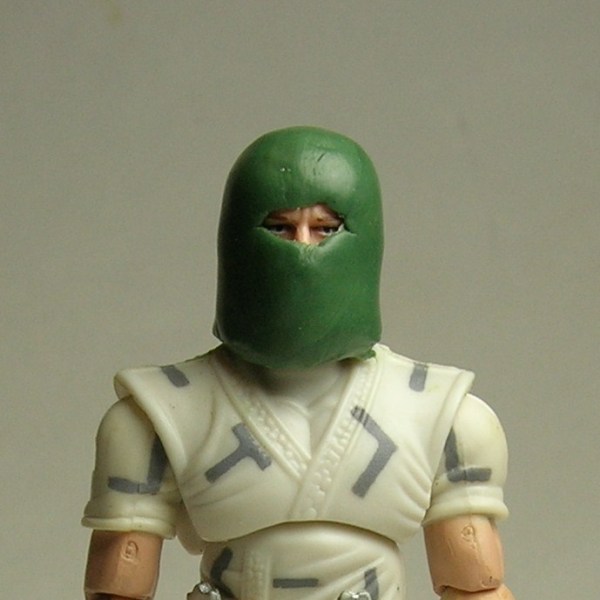
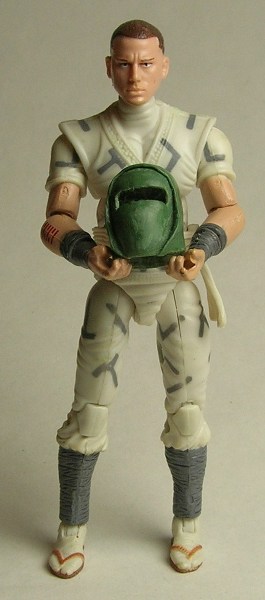
Once you’re happy with the hood, paint it up and send your hooded ninja on a mission.
Green Stuff
Plumbers Seal Tape
An unmasked head attached to the body you plan to use
Sculpting Tool
Exacto Knife
File/Sandpaper
Water (to keep the green stuff from sticking to your tool and fingers)
Choosing the right head to use is important. The bigger the head you use, the bigger the mask will be. Try to use a head that has short hair (or no hair), as long hair can lead to more problems. I chose the Duke head because I have quite a few of them plus it doesn’t have much hair.
Take the seal tape and cover the head and shoulders. This will keep the green stuff from sticking to the head and body. Credit to Asphalt for that gem. I would have never made a removable hood/mask if not for that tip.
You’ll want to put more seal tape around the neck and under the nose and ears. The idea is to make it so the hood can slide off and on easily without getting stuck. There’s a greater chance the hood will rip or tear when you remove it if it gets stuck.
Now mix some green stuff. It’s better to mix a little than to mix too much that you’ll end up wasting. Roll the green stuff into a snake and then spiral it around the head. Make sure to leave an opening where the eyes are located.
Smooth the green stuff out, covering the entire head and below while making sure to leave the eyes clear. A wet finger works well here.
You can mark where the bottom of the hood should be with the sculpting tool.
Remove the excess and let it cure. I usually wait until the next day before I work on it again.
Once it’s cured, you can remove the hood. Use the sculpting tool to loosen the hood (green stuff is flexible) from the head starting around the neck. You should be able to start pulling it off. Take your time because you don’t want to create any rips.
Once you clear the nose it should come right off.
Remove the seal tape from the head and hood.
See how it’s kind of thick around the bottom? Use the exacto knife to thin it out a little. If the hood was really tight, remove some of the green stuff from the inside. If the hood came off no problem, you can remove green stuff from the outside with the exacto of file. This will make the hood less bulky.
Check the fit of the hood and repeat the last step if it’s still too tight.
This is what it should look like.
Put the hood back on the head. Using the exacto, lightly mark where the opening for the eyes should be. You don’t want to cut it out just yet.
Remove the hood and cut out the opening. The top should be straight across, the sides curved outward, and the bottom an upside down “v”.
Oops, I screwed it up.
Here’s what you do if you mess it up. Remove the hood and use the seal tape again. Put the hood back on and then mix some more green stuff. You can fix rips in this manner too.
Add the green stuff to the trouble spot. Once it cures, repeat the steps again for the opening.
Now we’re ready to add some detail. Mix some green stuff and roll a thin snake. Place it around the front of the hood as shown.
Smooth the green stuff towards the back of the hood on all sides.
Using the rounded end of the sculpting tool, make some ripples around the edge.
Smooth everything out with a wet finger.
Using the spade end of the sculpting tool, thin the edge of the outer hood.
After the green stuff has cured, you can sand everything smooth and trim any problem areas with the exacto.
Once you’re happy with the hood, paint it up and send your hooded ninja on a mission.