
Post by Daremo on Oct 7, 2012 19:18:41 GMT -5
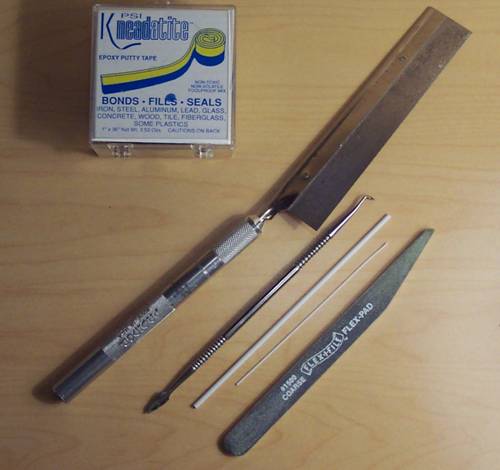
Step 1. Tools and Supplies:
Small Saw
Sculpting Tool
Green Stuff
Sand Paper/File
3/32" Tube
0.88mm Rod
Water
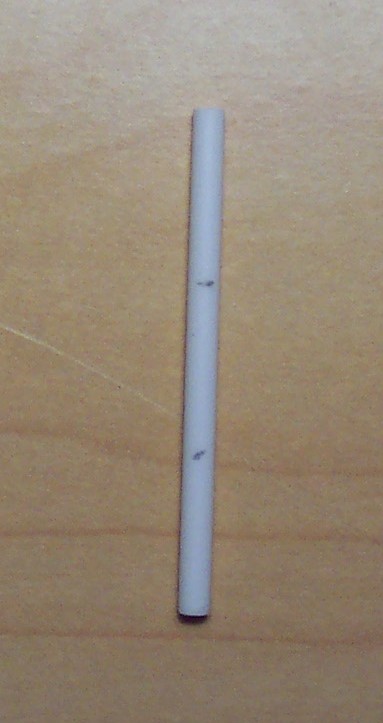
Step 2. Cut:
Take the 3/32" tube and cut a 2 1/2" section with the saw. Using the saw will allow you to avoid any crushing of the tube when you cut it. Sand the ends of both tube. Then divide the tube into thirds and mark it with a pencil.
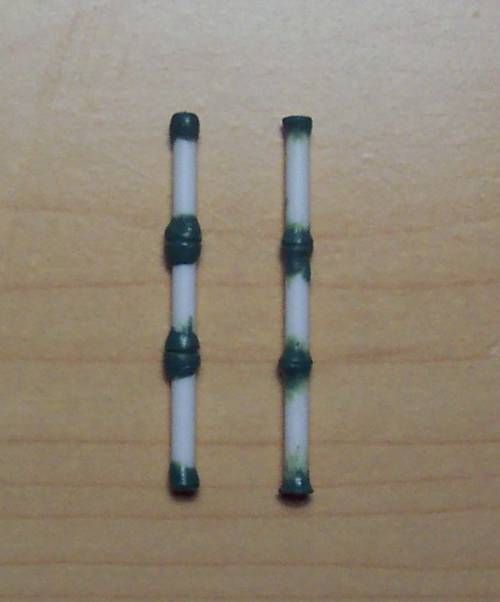
Step 3. Green Stuff:
First, if you've never worked with green stuff before, go to this thread for help. Take some green stuff and make 4 bands 1/16" wide at both ends and where you made the third markings. Remember to have water nearby to keep the green stuff from sticking to the tool. Take the spade end of the sculpting tool and divide the middle bands in half. Take the rounded end of the sculpting tool and curve the green stuff on both sides of the bands you just divided (going away from the division). Be careful not to "erase" the division you made. Now curve both bands at the ends of your blowgun. Once the green stuff cures/dries, you can sand the blowgun.
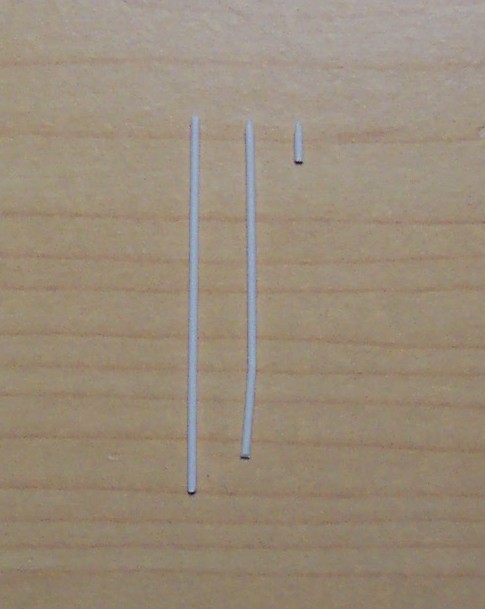
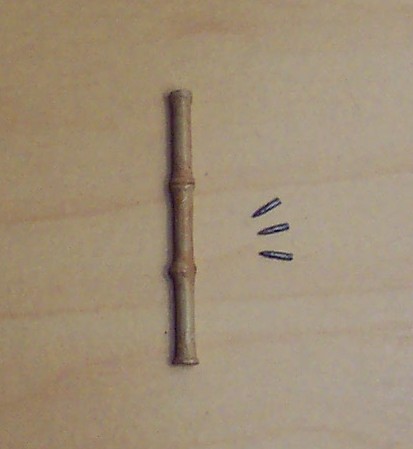
Step 4. Darts:
Cut a 1 1/2" section of the 0.88mm rod. Take the file and sand one end to a point. Now cut the rod to 3/16" from the point. You now have a dart for your blowgun.
Step 5. Paint:
It's time to paint. I'm using Testors Model Masters Acrylics. First, prime the blowgun and the darts. Then paint the blowgun sand and the darts flat black. Once they dry, wash the blowgun with either a dark brown or earth red and paint the darts steel. Once the paint dries, seal it with Testors Glosscote or Dullcote.
Small Saw
Sculpting Tool
Green Stuff
Sand Paper/File
3/32" Tube
0.88mm Rod
Water
Step 2. Cut:
Take the 3/32" tube and cut a 2 1/2" section with the saw. Using the saw will allow you to avoid any crushing of the tube when you cut it. Sand the ends of both tube. Then divide the tube into thirds and mark it with a pencil.
Step 3. Green Stuff:
First, if you've never worked with green stuff before, go to this thread for help. Take some green stuff and make 4 bands 1/16" wide at both ends and where you made the third markings. Remember to have water nearby to keep the green stuff from sticking to the tool. Take the spade end of the sculpting tool and divide the middle bands in half. Take the rounded end of the sculpting tool and curve the green stuff on both sides of the bands you just divided (going away from the division). Be careful not to "erase" the division you made. Now curve both bands at the ends of your blowgun. Once the green stuff cures/dries, you can sand the blowgun.
Step 4. Darts:
Cut a 1 1/2" section of the 0.88mm rod. Take the file and sand one end to a point. Now cut the rod to 3/16" from the point. You now have a dart for your blowgun.
Step 5. Paint:
It's time to paint. I'm using Testors Model Masters Acrylics. First, prime the blowgun and the darts. Then paint the blowgun sand and the darts flat black. Once they dry, wash the blowgun with either a dark brown or earth red and paint the darts steel. Once the paint dries, seal it with Testors Glosscote or Dullcote.