
Post by Daremo on Oct 7, 2012 18:42:17 GMT -5
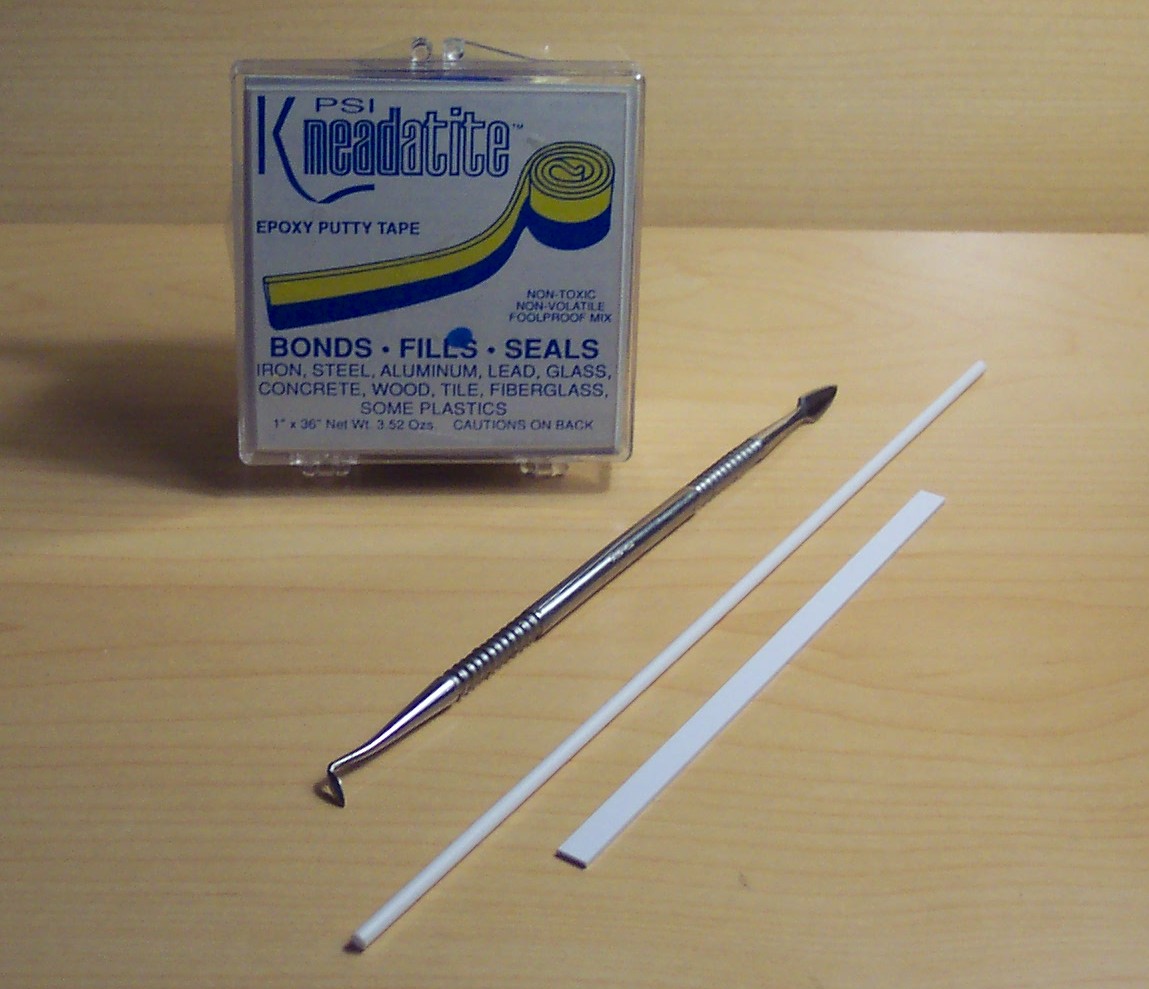
Step 1. Tools and Supplies:
Green Stuff
Sculpting Tool
3/32" Tube
Piece of Styrene or other plastic
WATER (not pictured but extremely important, helps keep green stuff from sticking to your fingers and tools)
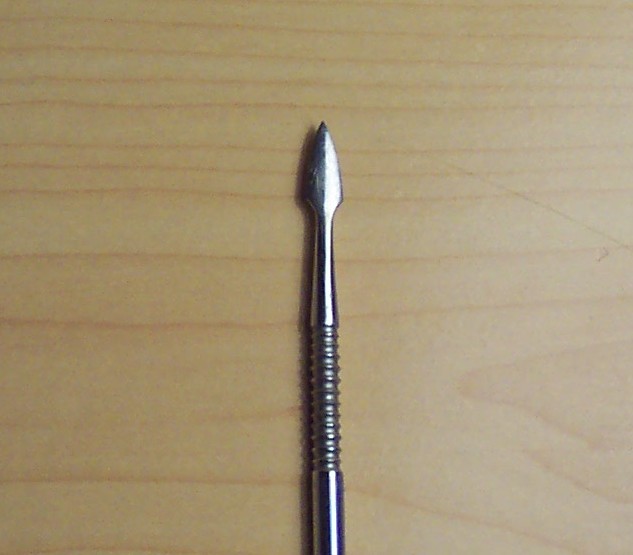
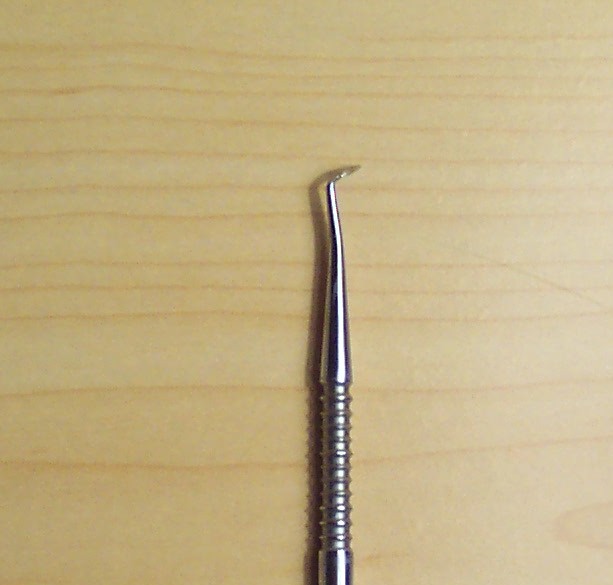
Step 2. The Sculpting Tool:
This is the Sculpting Tool I use almost exclusively for sculpting. In this tutorial, I will use the flat spade looking end for flattening and scoring the green stuff. I will use the other curved scoop looking end to add an impression to the green stuff. If you've never worked with green stuff before, go to this thread for help.
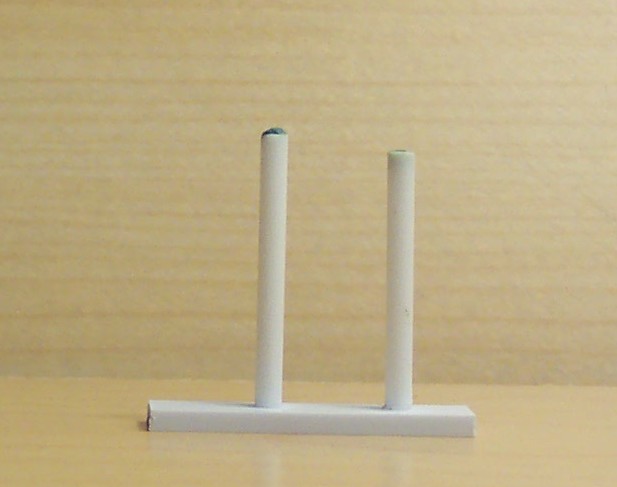
Step 3. Filling Holes:
Most of the tutorials that use 3/32" tubing will require holes to be filled. This is an easy fix. Take a small ball of mixed green stuff and stick it over the hole you that need to fill. Using the flat end of the sculpting tool, flatten the ball into the hole. Once it dries/cures you can trim or sand the excess off. The hole is now filled and you can paint over it any way that you'd like.
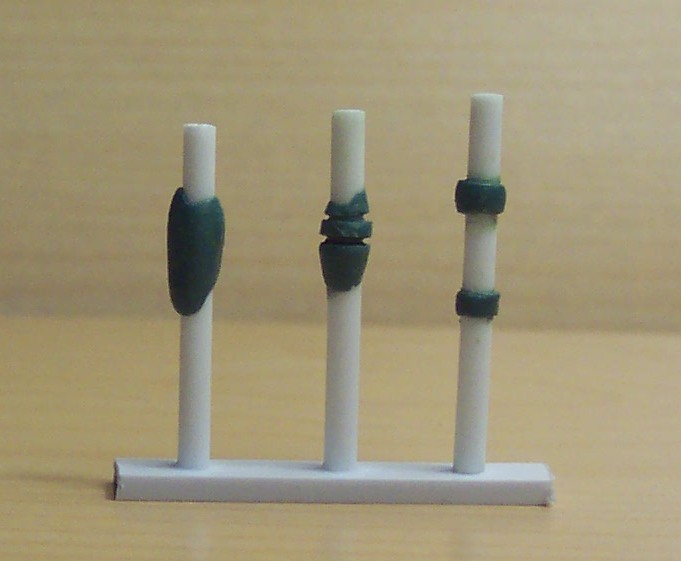
Step 4. Sculpting Bands:
We're going to add a band to a piece of 3/32" tubing. It's important to have a cup of water nearby to dip your sculpting tool. This is so your tool doesn't end up sticking to the green stuff and inadvertently messing up your sculpting. Take a small amount of mixed green stuff and cover a small section of the tubing in a thin layer all the way around. Using the flat end of the sculpting tool, score a line into the green stuff. I usually spin the tubing in my hand while leaving the tool stationary. Once the first line has been made, score another line about an 1/16" below it (just like the first score you made). Now clean and trim the excess green stuff and you have your band. You can also vary the size of your bands by having a thicker layer of green stuff or making the band greater or less than 1/16".
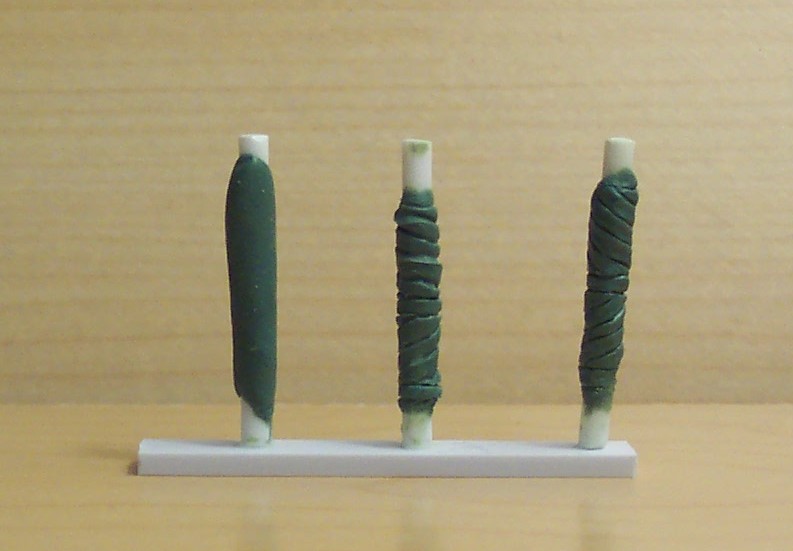
Step 5. Sculpting Wraps:
Make sure to have your water nearby to keep your tool moist so the green stuff won't stick. Take a 3/32" tube and add a thin layer of green stuff around it. Sculpt bands (1/8") at the bottom and in the middle of the green stuff but don't trim the excess. In the middle of the newly created bands were going to sculpt another band. This band is just like the other bands except that it will travel from the bottom left to the top right. Think of a "Z", where the top and bottoms of the Z are the top and bottom bands and the middle of the Z will be the new band you are creating.
Score the first line completely before adding the second score of the band. You should now have a 1/8" angled band connecting the top and bottom bands. Repeat this step, using the score line from the previous band to make new 1/8" bands until you have filled the area between the original bands. Next we will make bands above the band in the middle of the green stuff. These bands are made exactly like the Z bands made in the lower section except we are reversing the direction. Think of a mirrored "Z". Now we will start from the bottom right and go to the top left. Take the first score line of this new area all the way to the top of the green stuff. Make bands just like the lower area until this area is filled. Once the the top area has been filled, score a horizontal line across the top of the green stuff.
Now were ready add depth to the bands. Take the other end of the sculpting tool and using the rounded end push it into each band. This will give the effect that the bands are layered. Once you've done this to all the bands your wrap will be complete.
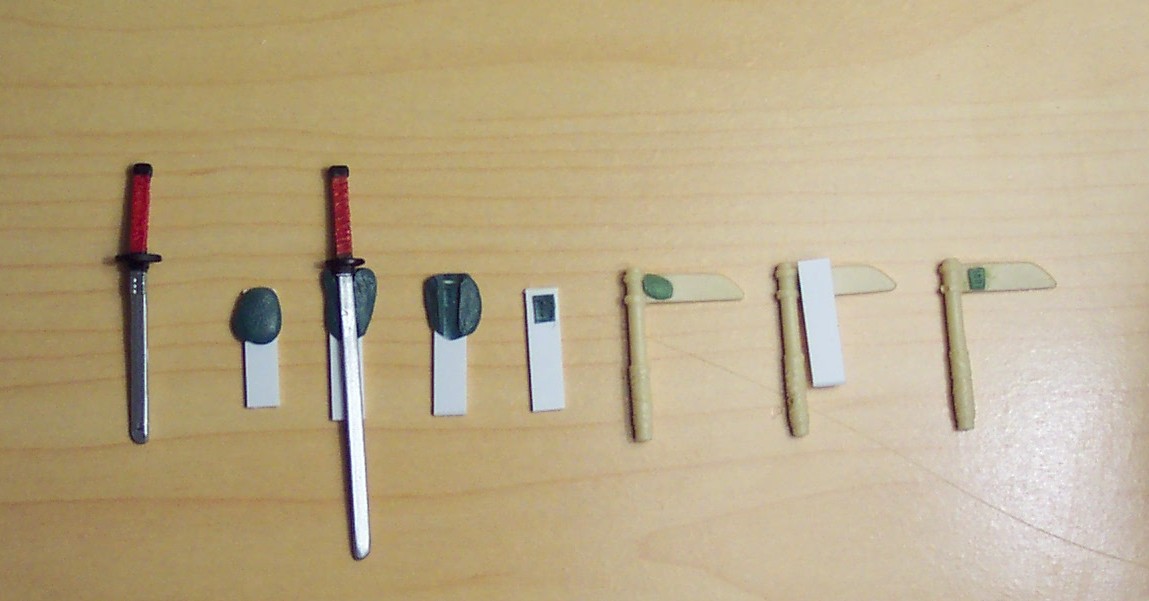
Step 6. Push Stamp:
Want to add an Arashikage Clan Symbol to your weapons? Here's how. First you'll need Storm Shadow's sword. Take a small amount of green stuff and attach it to a piece of styrene. This will be your Push Stamp. Dip the sword in water making sure to get the symbol area on the sword wet. Take the sword and press it into the green stuff. Remove the sword immediately, making sure the green stuff has captured all the details. If the sword sticks too much, reset the green stuff, wet the sword, and try again. Let the push stamp dry/cure, and then trim the excess being careful not to harm the details. Now take the weapon that you want to have the symbol and add a small amount of green stuff to it. Wet your push stamp and then push it into the green stuff. Remove the push stamp, trim the symbol, and you should have an Arashikage Clan Weapon. This technique works for lots of other tihngs too, like cobra symbols, medals, etc.
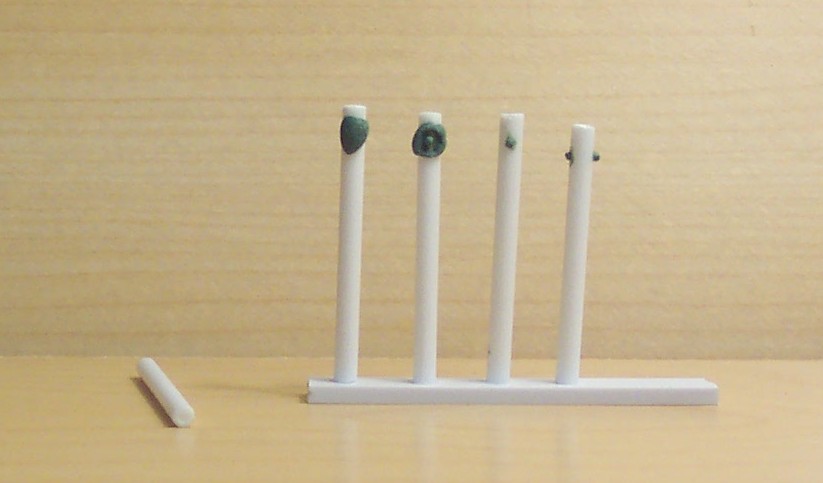
Step 7. Sculpting Rivets:
Something a little easier now. Take a very small piece of green stuff and put it where you want to add a rivet. Take a 3/32" piece of tubing and dip it in water and then push it into the area that you want the rivet. Trim the excess and you have a rivet. Bigger holes=Bigger rivets, more green stuff in the hole will give you longer rivets.
Examples of Bands, Wrap, Rivets:
Bands on a section of the three section staff and kama
Wrap on a kama
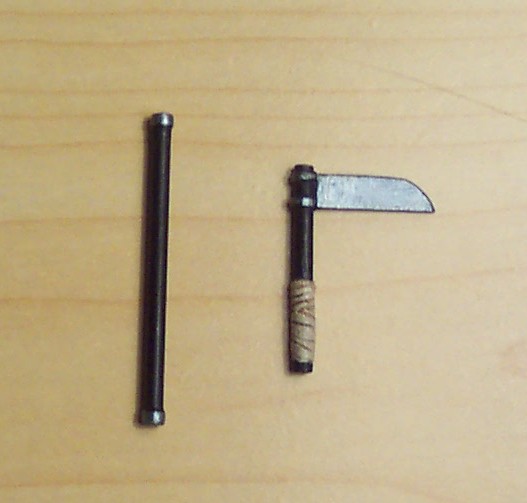
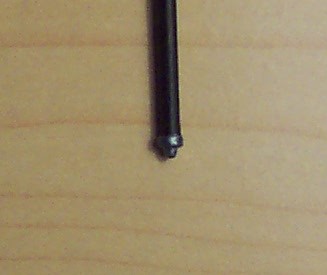
Rivet on the end of a staff
Green Stuff
Sculpting Tool
3/32" Tube
Piece of Styrene or other plastic
WATER (not pictured but extremely important, helps keep green stuff from sticking to your fingers and tools)
Step 2. The Sculpting Tool:
This is the Sculpting Tool I use almost exclusively for sculpting. In this tutorial, I will use the flat spade looking end for flattening and scoring the green stuff. I will use the other curved scoop looking end to add an impression to the green stuff. If you've never worked with green stuff before, go to this thread for help.
Step 3. Filling Holes:
Most of the tutorials that use 3/32" tubing will require holes to be filled. This is an easy fix. Take a small ball of mixed green stuff and stick it over the hole you that need to fill. Using the flat end of the sculpting tool, flatten the ball into the hole. Once it dries/cures you can trim or sand the excess off. The hole is now filled and you can paint over it any way that you'd like.
Step 4. Sculpting Bands:
We're going to add a band to a piece of 3/32" tubing. It's important to have a cup of water nearby to dip your sculpting tool. This is so your tool doesn't end up sticking to the green stuff and inadvertently messing up your sculpting. Take a small amount of mixed green stuff and cover a small section of the tubing in a thin layer all the way around. Using the flat end of the sculpting tool, score a line into the green stuff. I usually spin the tubing in my hand while leaving the tool stationary. Once the first line has been made, score another line about an 1/16" below it (just like the first score you made). Now clean and trim the excess green stuff and you have your band. You can also vary the size of your bands by having a thicker layer of green stuff or making the band greater or less than 1/16".
Step 5. Sculpting Wraps:
Make sure to have your water nearby to keep your tool moist so the green stuff won't stick. Take a 3/32" tube and add a thin layer of green stuff around it. Sculpt bands (1/8") at the bottom and in the middle of the green stuff but don't trim the excess. In the middle of the newly created bands were going to sculpt another band. This band is just like the other bands except that it will travel from the bottom left to the top right. Think of a "Z", where the top and bottoms of the Z are the top and bottom bands and the middle of the Z will be the new band you are creating.
Score the first line completely before adding the second score of the band. You should now have a 1/8" angled band connecting the top and bottom bands. Repeat this step, using the score line from the previous band to make new 1/8" bands until you have filled the area between the original bands. Next we will make bands above the band in the middle of the green stuff. These bands are made exactly like the Z bands made in the lower section except we are reversing the direction. Think of a mirrored "Z". Now we will start from the bottom right and go to the top left. Take the first score line of this new area all the way to the top of the green stuff. Make bands just like the lower area until this area is filled. Once the the top area has been filled, score a horizontal line across the top of the green stuff.
Now were ready add depth to the bands. Take the other end of the sculpting tool and using the rounded end push it into each band. This will give the effect that the bands are layered. Once you've done this to all the bands your wrap will be complete.
Step 6. Push Stamp:
Want to add an Arashikage Clan Symbol to your weapons? Here's how. First you'll need Storm Shadow's sword. Take a small amount of green stuff and attach it to a piece of styrene. This will be your Push Stamp. Dip the sword in water making sure to get the symbol area on the sword wet. Take the sword and press it into the green stuff. Remove the sword immediately, making sure the green stuff has captured all the details. If the sword sticks too much, reset the green stuff, wet the sword, and try again. Let the push stamp dry/cure, and then trim the excess being careful not to harm the details. Now take the weapon that you want to have the symbol and add a small amount of green stuff to it. Wet your push stamp and then push it into the green stuff. Remove the push stamp, trim the symbol, and you should have an Arashikage Clan Weapon. This technique works for lots of other tihngs too, like cobra symbols, medals, etc.
Step 7. Sculpting Rivets:
Something a little easier now. Take a very small piece of green stuff and put it where you want to add a rivet. Take a 3/32" piece of tubing and dip it in water and then push it into the area that you want the rivet. Trim the excess and you have a rivet. Bigger holes=Bigger rivets, more green stuff in the hole will give you longer rivets.
Examples of Bands, Wrap, Rivets:
Bands on a section of the three section staff and kama
Wrap on a kama
Rivet on the end of a staff