
Post by Daremo on Oct 7, 2012 17:58:26 GMT -5
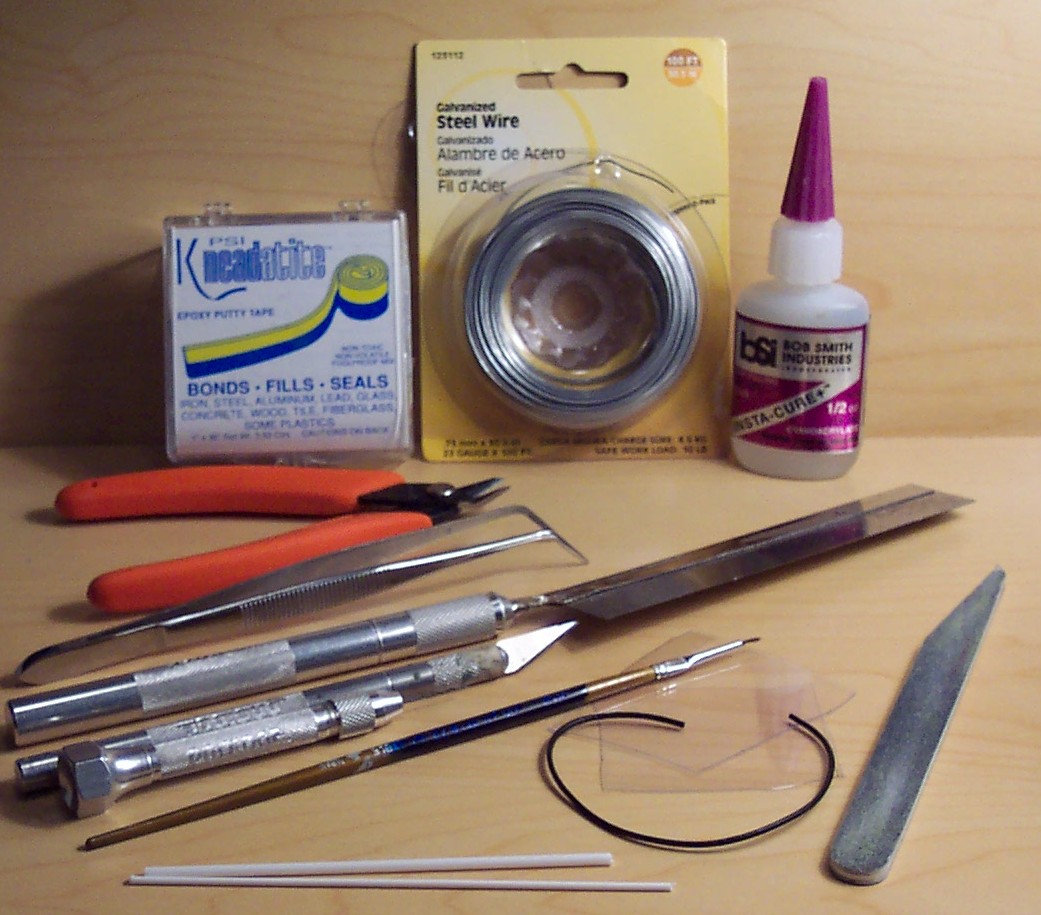
Step 1. Tools and Supplies:
Wire Cutter
Small Saw
Hobby Knife
Tweezers
Drill (.028? same size as the wire)
Super Glue
Sand Paper/File
3/32" Tube
1/16" Rod
22 ga Galvanized Wire
Leather Cord (round leather banding for making necklaces/bracelets from a craft store)
2 Flat Pieces Of Plastic (I'm using the plastic bubble from a carded figure)
Kneadatite (I ordered some online)
Paint Brush (5/0 or similar size)
Step 2. Cut:
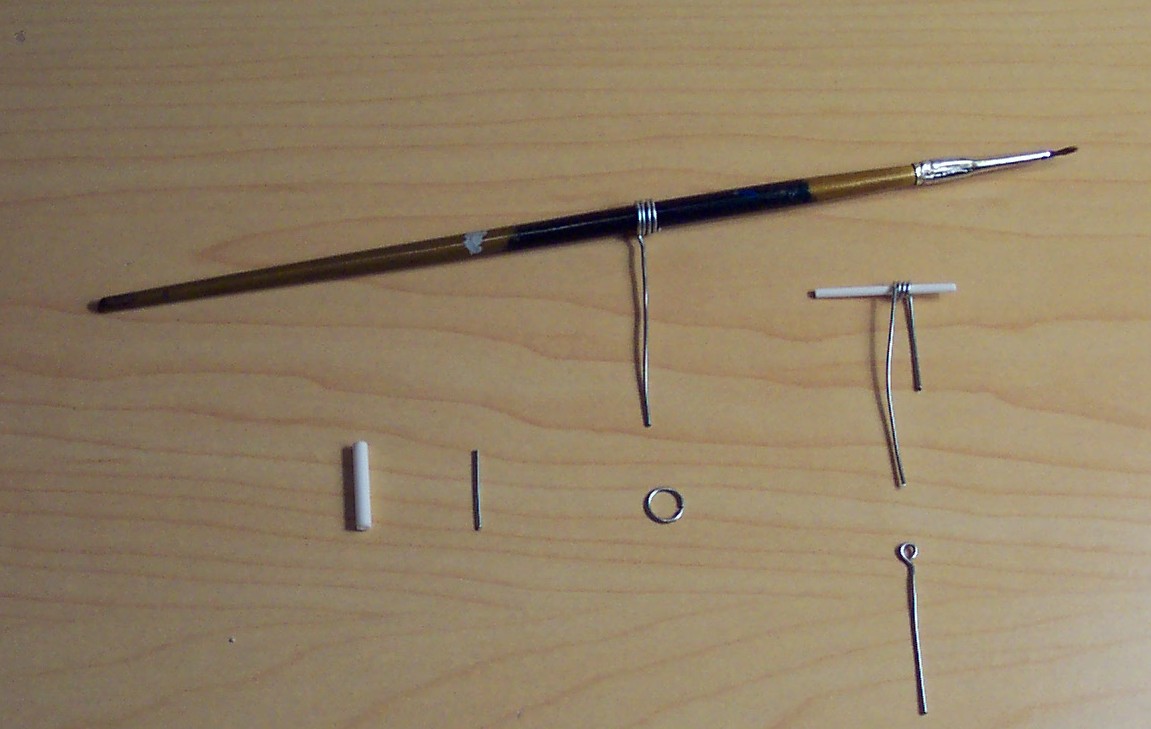
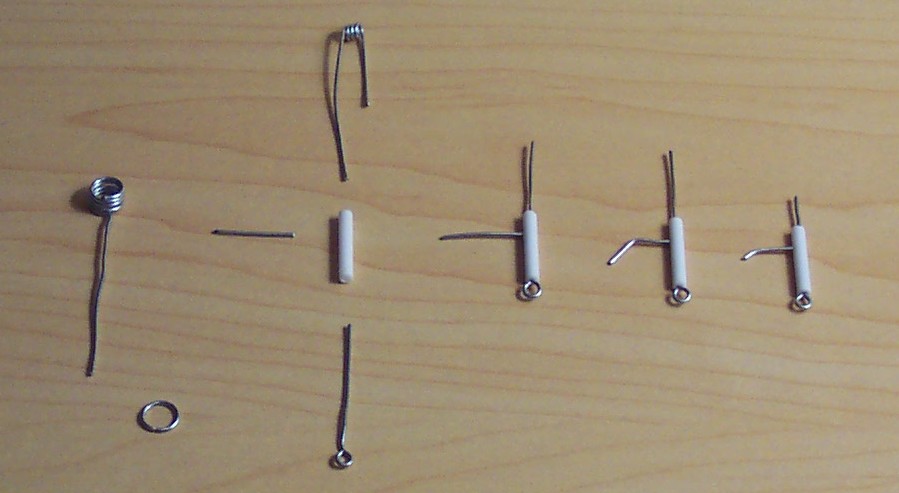
First cut a 5/8" piece of the 3/32" tube with the saw for the handle and sand the ends. Cut a 5/8" piece of wire for the curved blade and two 3" pieces of wire with the wire cutter. Take one of the 3" pieces of wire (this will become the large ring at the end of the cord) and wrap it around the paint brush 3 to 4 times. Make sure you keep it tight, use the tweezers to help if you need to. Take the second 3" piece of wire (this will become the eyebolt and pointed end of the weapon) and wrap it around the 1/16" rod 3 to 4 times keeping it tight. Leave at least 1 1/2" unwrapped. Remove the wires from the paintbrush and the rod, then cut them with the wire cutter so you are left with a ring and your very own jackstay eyebolt. You may need to straighten the eyebolt with the tweezers. Lastly, cut a piece of the leather cord 6 1/2-8 1/2".
Step 3. Make An Armature:
Take the eyebolt and glue it to the inside of the 5/8" tube. Next, drill a hole for the curved blade 3/16" from the top (opposite end of the eye of the eyebolt). Make sure that you drill the hole so that the curved blade will be parallel to the eyebolt (as seen in the photo). Glue the 5/8" wire for the curved blade in the hole. Once it dries, make a bend 1/4" from the handle with the tweezers. Now trim the ends 1/8" from the bend on the curved blade wire and 5/16" from the handle for the pointed end. This completes the armature.
Step 4. Green Stuff:
Now that we have an armature we're ready to sculpt the weapon ends. Even if you've never worked with green stuff, you can still try this, it's not going to be too difficult. Check out this thread for help if you need it. Remember to have some water nearby to keep the green stuff from sticking to your fingers. Mix up some green stuff, you don't need a lot. Take half of the green stuff and put it around the top of the weapon. Keeping your fingers wet, work the green stuff evenly up the weapon to a point. Next, take the other half of your green stuff and put it around the curved blade. Wet the two pieces of plactic and place them on either side of the curved blade. Make the blade as even as possible by applying pressure, then remove the plastic and let the green stuff dry (at least 3 hours). Be careful not to touch the ends before it's dry. Once it's dry take your file and sand the pointed end so it looks even with the handle. Take your hobby knife and cut the shape of the curved blade to match the one in the photo. Try to follow the curve of the wire. Lastly, use the file to add an edge to the curved blade.

Step 5. Attach:
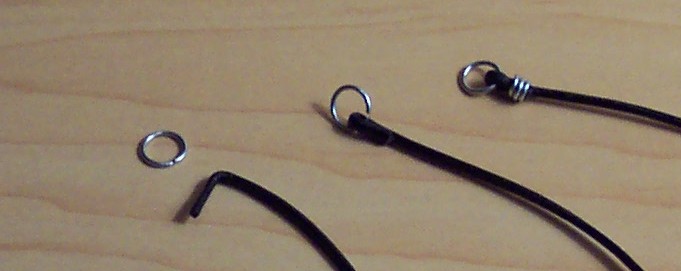
Almost done. Next, take the cord and fold it over 1/4" at the end. Insert the large ring and glue the cord to itself. Take the other end of the cord and fold it over 1/4". Then snake it through the eyebolt of the weapon and glue the cord to itself. Make sure you don't glue your fingers to the cord. You can stop here if you want, or alternatively add some rings to the ends of the cord by wrapping wire around the cord the same way you wrapped the wire around the paintbrush and rod. Cut the ends off the wire on both ends and then use the tweezers to "flatten" the ends of the rings. Be careful when handling the ends of the wire, they tend to be prickly.
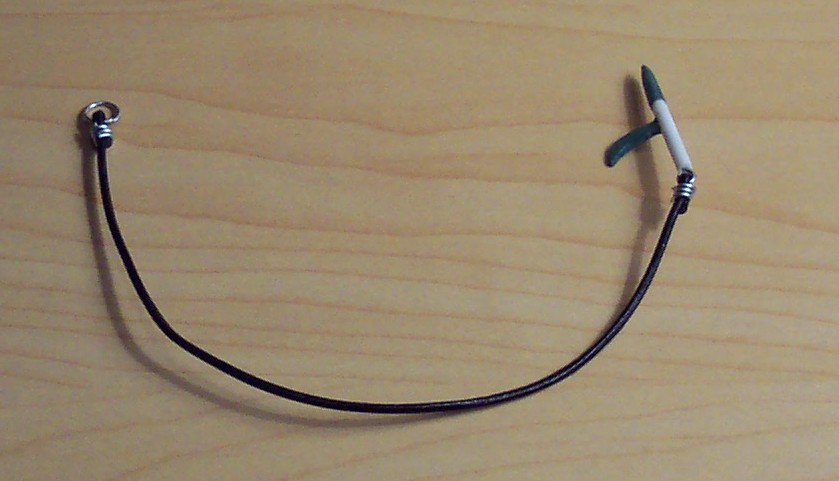
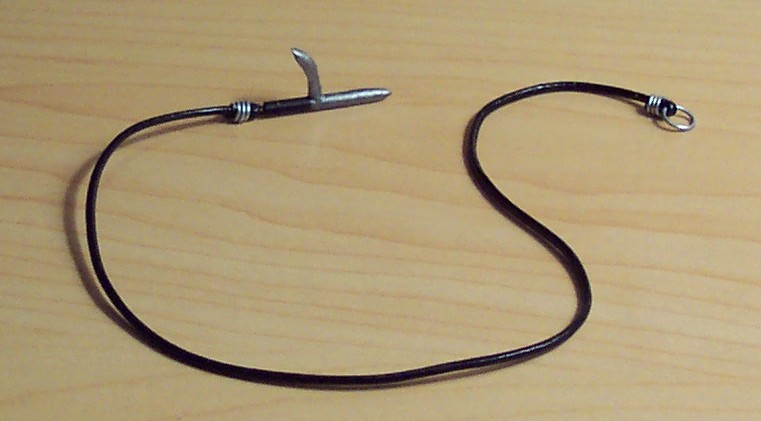
Step 6. Completed Kyoketsu-Shogei:
This is your completely constructed Kyoketsu-Shogei.
Step 7. Paint:
Now were ready to paint (I recommend acrylics like Model Masters Acrylics, Citadel Paints, or Tamiya Paints). First, prime the weapon. Then paint the whole thing flat black. Next, paint the blades steel. Once the paint dries, seal it with Testors Glosscote or Dullcote and you're finished!
Wire Cutter
Small Saw
Hobby Knife
Tweezers
Drill (.028? same size as the wire)
Super Glue
Sand Paper/File
3/32" Tube
1/16" Rod
22 ga Galvanized Wire
Leather Cord (round leather banding for making necklaces/bracelets from a craft store)
2 Flat Pieces Of Plastic (I'm using the plastic bubble from a carded figure)
Kneadatite (I ordered some online)
Paint Brush (5/0 or similar size)
Step 2. Cut:
First cut a 5/8" piece of the 3/32" tube with the saw for the handle and sand the ends. Cut a 5/8" piece of wire for the curved blade and two 3" pieces of wire with the wire cutter. Take one of the 3" pieces of wire (this will become the large ring at the end of the cord) and wrap it around the paint brush 3 to 4 times. Make sure you keep it tight, use the tweezers to help if you need to. Take the second 3" piece of wire (this will become the eyebolt and pointed end of the weapon) and wrap it around the 1/16" rod 3 to 4 times keeping it tight. Leave at least 1 1/2" unwrapped. Remove the wires from the paintbrush and the rod, then cut them with the wire cutter so you are left with a ring and your very own jackstay eyebolt. You may need to straighten the eyebolt with the tweezers. Lastly, cut a piece of the leather cord 6 1/2-8 1/2".
Step 3. Make An Armature:
Take the eyebolt and glue it to the inside of the 5/8" tube. Next, drill a hole for the curved blade 3/16" from the top (opposite end of the eye of the eyebolt). Make sure that you drill the hole so that the curved blade will be parallel to the eyebolt (as seen in the photo). Glue the 5/8" wire for the curved blade in the hole. Once it dries, make a bend 1/4" from the handle with the tweezers. Now trim the ends 1/8" from the bend on the curved blade wire and 5/16" from the handle for the pointed end. This completes the armature.
Step 4. Green Stuff:
Now that we have an armature we're ready to sculpt the weapon ends. Even if you've never worked with green stuff, you can still try this, it's not going to be too difficult. Check out this thread for help if you need it. Remember to have some water nearby to keep the green stuff from sticking to your fingers. Mix up some green stuff, you don't need a lot. Take half of the green stuff and put it around the top of the weapon. Keeping your fingers wet, work the green stuff evenly up the weapon to a point. Next, take the other half of your green stuff and put it around the curved blade. Wet the two pieces of plactic and place them on either side of the curved blade. Make the blade as even as possible by applying pressure, then remove the plastic and let the green stuff dry (at least 3 hours). Be careful not to touch the ends before it's dry. Once it's dry take your file and sand the pointed end so it looks even with the handle. Take your hobby knife and cut the shape of the curved blade to match the one in the photo. Try to follow the curve of the wire. Lastly, use the file to add an edge to the curved blade.
Step 5. Attach:
Almost done. Next, take the cord and fold it over 1/4" at the end. Insert the large ring and glue the cord to itself. Take the other end of the cord and fold it over 1/4". Then snake it through the eyebolt of the weapon and glue the cord to itself. Make sure you don't glue your fingers to the cord. You can stop here if you want, or alternatively add some rings to the ends of the cord by wrapping wire around the cord the same way you wrapped the wire around the paintbrush and rod. Cut the ends off the wire on both ends and then use the tweezers to "flatten" the ends of the rings. Be careful when handling the ends of the wire, they tend to be prickly.
Step 6. Completed Kyoketsu-Shogei:
This is your completely constructed Kyoketsu-Shogei.
Step 7. Paint:
Now were ready to paint (I recommend acrylics like Model Masters Acrylics, Citadel Paints, or Tamiya Paints). First, prime the weapon. Then paint the whole thing flat black. Next, paint the blades steel. Once the paint dries, seal it with Testors Glosscote or Dullcote and you're finished!